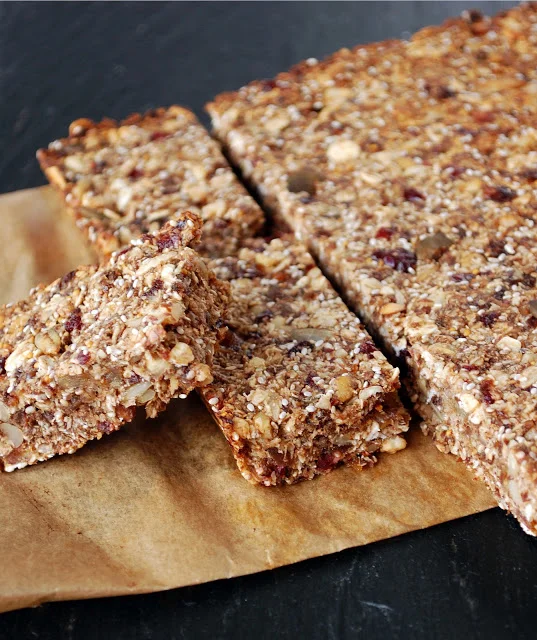
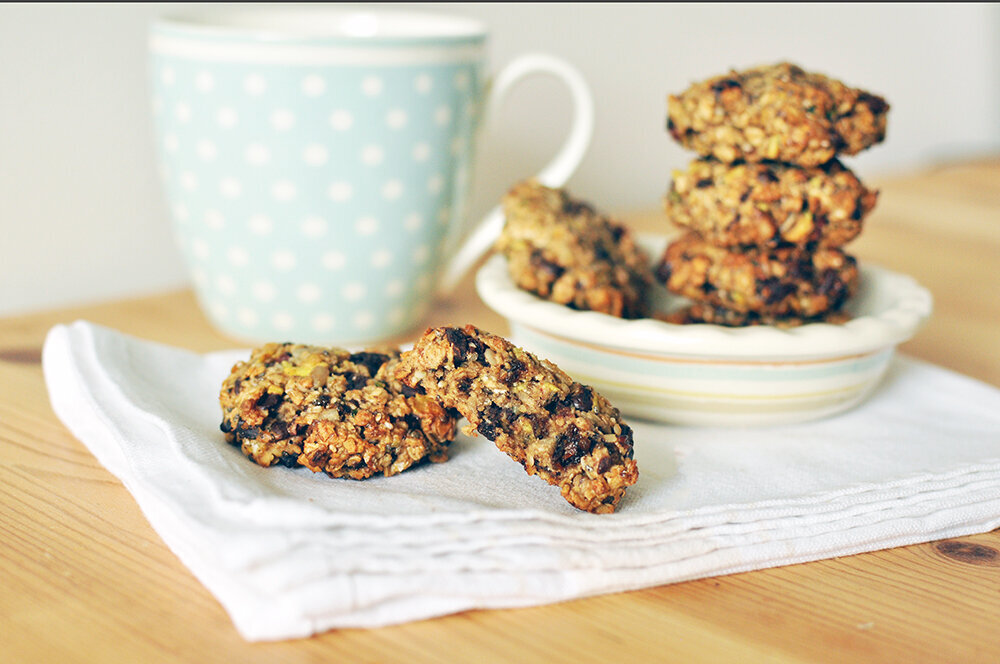
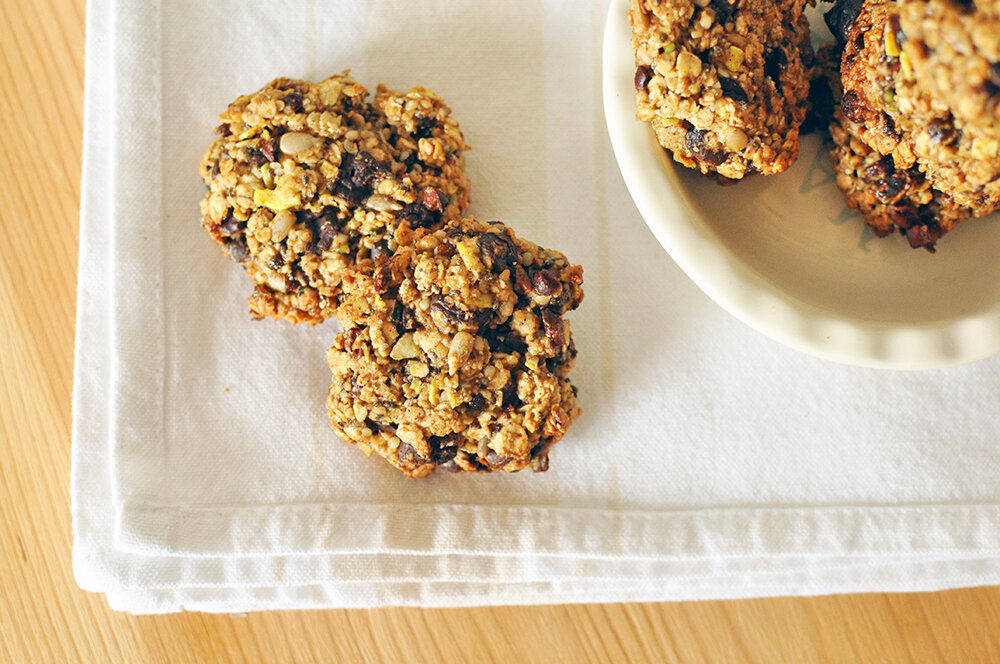
Chewy & Crispy Oat Cookies (and they are oil-free!)
A few days ago I really fancied a flapjack but the classic recipes typically have a lot of oil and sugar, and the recipes without oil are more like healthy soft granola bars (still great but just not what I craved!)
So I decided to put the aquafaba I had sitting in the fridge to the test!
It was such a success… crispy when fresh out the oven during the first day then gorgeously chewy for the following few days (not that they lasted very long!)
I seems I have acquired a bit of an aquafaba (aka chickpea water) obsession!
If you’ve seen my granola and chocolate cake recipes… you’ll know ;-)
I think it’s such a wonderful ingredient for two big reasons:
It’s the brine from a can of chickpeas (or other white beans) and a staple ingredient we all have in our cupboards and one that usually gets drained down the plughole. (So in effect is zero cost too!)
It whips up all white and frothy and can create a beautiful light moist cake crumb and even better can replace most or all of the oil in a recipe whilst still giving a crispy and chewy texture the way oil typically would.
A few days ago I really fancied a flapjack but the classic recipes typically have a lot of oil and sugar, and the recipes without oil are more like healthy soft granola bars (still great but just not what I craved!)
So I decided to put the aquafaba I had sitting in the fridge to the test!
Instead of bars I dolloped the mix into cookies instead as I wanted more crispy ‘edge’ texture, but a regular flapjack slab baked and sliced should totally work too.
It was such a success, crispy when fresh out the oven during the first day then gorgeously chewy for the following few days (not that they lasted very long!)
Such a versatile recipe too… I have noted some swaps below.
I used Boost Your Bowl Toppers but if you don’t have any of your own- swap with chopped dried fruit and some chopped coconut chips (coconut is optional but I find gives extra chewiness).
If you make these, please tag @eatboostyourbowl on Instagram, I always love to see your creations!
Recipe: Chewy & Crispy Oat Cookies
Ingredients:
1/2 cup whipped up aquafaba (aka chickpea water)
1/4 cup peanut butter (or any nut butter) - this is optional
1 tsp vanilla extract
2 cups porridge oats
1/2 cup flour of choice (or ground up oats - just to help bind the mix so it doens’t fall apart)
1 cup chopped nuts/seeds of choice
1/2 cup Boost Your Bowl Toppers of your choice (or chopped dried fruit)
1/3 cup coconut sugar (or any sugar)
large handful of dark chocolate chunks for extra indulgence - optional but highly recommended!
1/2 heaped tsp baking powder
1/4 tsp sea salt
Method:
Whip up the aqua faba until it’s nice and frothy then add the nut butter and vanilla extract and blend into the aquafaba.
In a separate large bowl, mix all the remaining dry ingredients together. Pour in the aquafaba mix and stir well to coat the mix well.
I kind of used my hands and a spoon to place semi-compacted dollops of the mix on to a lined baking sheet.
Bake at 180ºC for approx 15 mins until golden. Cool fully and store ina airtight container for 3-4 days (possibly longer but mine all got eaten by day 3!) I haven’t yet tried freezing them.


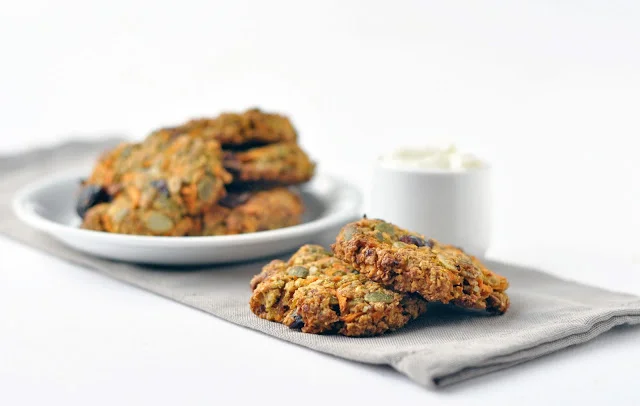


Crispy & Crunchy Oil-Free granola (secret ingredient!!)
So it's a Sunday morning and my plan was to have a whole day off to write letters and do creative arty stuff.
But I made this epic granola a few days ago and I've been eating it by the handful ever since, so I figured if you are having a chilled out Sunday like me (well, I will be shortly!) you might like to make some too!
In fact, I highly recommend you make some at your earliest opportunity :-)

I am a homemade granola lover, but I tend to eat it in ridiculous amounts as soon as I make it and typically even the healthy versions have quite a lot of oil to make it super crispy… Not this one!
So easy to make!
So many varieties to try!
Sooooo healthy too!
Have you had a guess at the secret ingredient that replaces the oil and still make for a crispy, crunchy granola that does not go dost by the next day? (I’m on day four now and it’s still just as crispy!)
Ok, i’ll let you in on the secret…
It’s ‘aqua faba’ (aka chickpea water)
Whaaaaattt??!!
Yup, just some of the juice out of the can of chickpeas! The stuff you usually rinse away.
I don’t know all the science behind it, but I know it works and that’s good enough for me.
I mixed in Apple Crumble Boost Your Bowl Toppers at the end (after baking otherwise it’ll burn), but you could use any flavour Toppers or simply some chopped dried fruit of choice if you have no Toppers to hand.
This is a ‘basic’ recipe but you could add cocoa and some chocolate chunks or nibs for a chocolatey option, or other spices to suit other flavour combos.
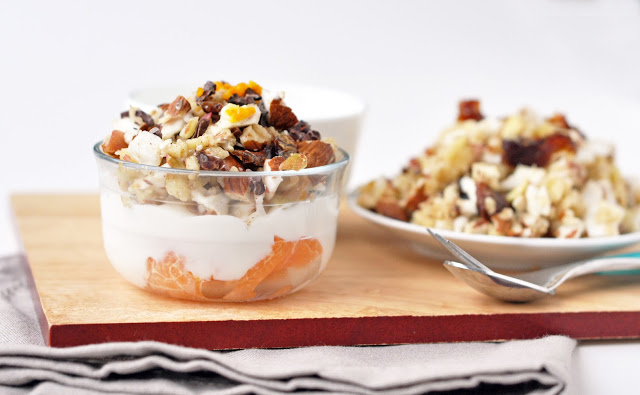
Serve it…
Straight with milk or a dollop of yoghurt
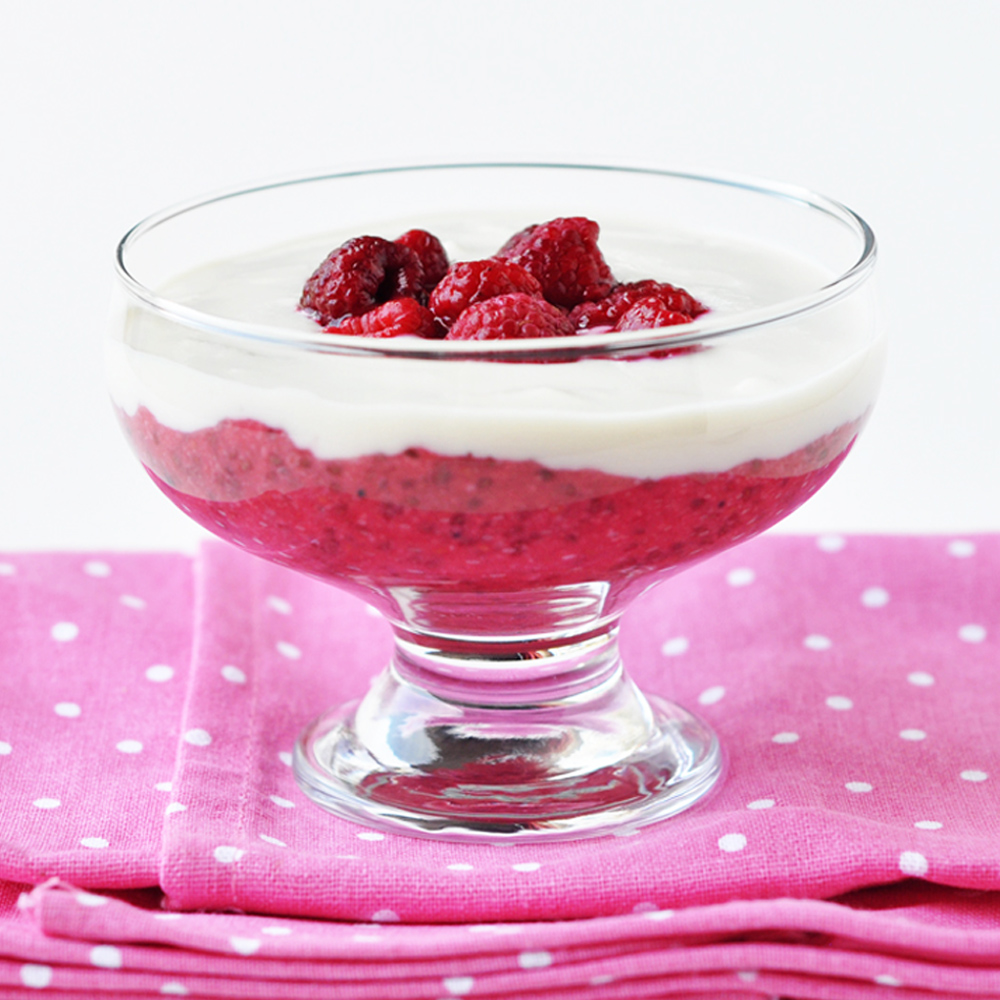
Layer it up as a ‘breakfast parfait’.
You could even use it to decorate a cheesecake, ice-cream or similar dessert needing a topping.
Or, erm… straight out of the container with your hands (don’t judge me!)
If you make it I would love to see your creations! Tag @eatboostyourbowl on Instagram.

Recipe: Crispy Oil-free Granola
Ingredients:
3 cups oats
1 cup chopped nuts or seeds of choice
2 tbs chia of flax seeds
1/2 tsp sea salt
1 tsp cinnamon and/or vanilla extract
1/4 cup aqua faba (chickpea water)
1/3 cup syrup of choice (I used maple syrup)*
approx 1/2 cup Boost Your Bowl Toppers - stirred through after baking
*If you feel you want to increase the sweetness a little, add 1-3 tbs granulated sugar as well as the syrup. I liked it as it was, especially once the Toppers were mixed in.
Method:
Preheat oven to 180ºC.
Whip the aquafaba with an electric beater until it gets frothy and begins to form stiff peaks* - this may take 5-10 mins. Add the syrup and whip again briefly.
Mix all remaining ingredients (NOT the Toppers/ dried fruit) in a mixing bowl, toss together then add the whipped aquafaba and syrup mix last, Stir well to combine.
Spoon on to a large lined baking sheet in an even layer. Bake for approx 25-30 mins until golden and crispy. Allow to cool and mix the Toppers/dried fruit through.
Store in an airtight container for up to two weeks.
*Don’t worry too much if it doesn't form peaks or change much in volume since mine didn't fpr some reason and it still worked out great. The reason for whipping first is to increase the volume so it covers the granola mix much more effectively.


Snickers Bliss Balls
You know I am a bliss ball lover right? If you’ve been in my world for more than a millisecond I’m pretty sure you do ;-)
I even wrote a whole recipe book dedicated to them… and it’s only £4!
Just sayin’ ;-)
Anyway, I was feeling in the mood for something munchy and sweet. Ok, basically I was procrastinating. (procrastisnacking- Is that a thing?)
Earlier I had found a bag of unopened red-skinned peanuts in my pantry and evidently they were on my mind since the idea for chocolate peanut bars was the first thing that entered. I have made a similar recipe before and formed them into bars then dipped them in chocolate BUT that was messy and took longer. This time I added cacao nibs (you could use dark choc chunks of you had some) and blitzed those in too.
Easy peasy, chocolatey, peanutty…
If you are a chocolate and peanut lover I highly recommend you give these a go this weekend!

Recipe: Snickers Bliss Balls
Ingredients:
1 cup peanuts
1 1/2 cups dates* (packed)
1/2 cup cocoa
2 tbs peanut butter - optional but good for all-round texture!
1/4 tsp sea salt
1/4 cup cacao nibs or chocolate chunks
Optional- a few drops caramel essence if you have it (I use Foodies Flavours buttery caramel!). Or use vanilla extract.
Method:
Bake the peanuts at ~180C for 5-8 mins until just golden and they smell good! - they do burn quick so be warned a d keep a close eye on them!
Meanwhile, add the dates, cocoa, peanut butter, salt and caramel/vanilla flavour to a food processor and blitz until the mix is blended down and a little sticky- you’ll likely need to add 1-3tbs water as you blitz.
*If your dates are very hard you may want to soak them first and drain them well before blitzing (you probably won’t need to extra water this way)
Once the nuts are roasted, add them (skins fine too) along with the cacao nibs and pulse through to chop/mix in well to reach desired texture.
Roll into balls or bars and chill in the fridge.
You could go one step further and drizzle or coat them in dark chocolate for a more snickers-like experience!
Note: if you are using chocolate chunks wait until the nuts are cold before you mix them through otherwise the chocolate will melt everywhere – unless that’s what you want! 😉
You could also make this recipe with other nuts of choice such as almonds or pistachios - ideally match he nut butter to the whole nut.


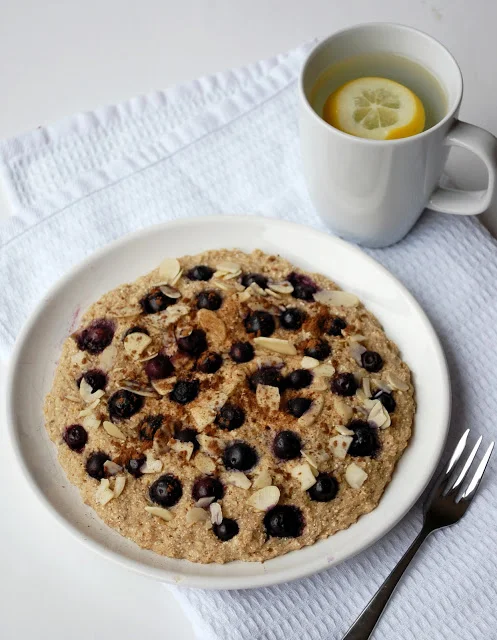
Apple Crumble Baked Oats
Whatever you're feeling right now, I hope to have something to lift your spirits whilst in social isolation. With the launch of the new website, I wanted to kick start with a few recipes for you to try out. Many of these can be made without BYB Toppers - BUT they are of course extra yummy if you buy yourself a pack to use… just sayin’
This morning, I treated myself to an epic breakfast using the Apple Crumble Toppers. Super easy and an epic breakfast treat. I hope you enjoy it too!
If you haven't already I'd love you to come hang out with me on Instagram and you make the recipe I would LOVE you to take a pic and tag me! If there is anything I need right now, it is a little more connection - and I reckon the humble oat can do just that! :-)
As I write this, I’m sitting at my dining table dressed in the slouchiest clothes possible with a tasselled poncho over the top as i’m feeling kinda chilly. Proper working from home vibes going down.
To be fair, I’m often working from home, but now the whole world is in on the act due to Coronavirus I’ve upped my game on the fashion agenda. ;-)
So how are you doing? Really…
...Happy? Frustrated? Hanging in there?
Whatever you're feeling right now, I hope to have something to lift your spirits whilst in social isolation. With the launch of the new website, I wanted to kick start with a few recipes for you to try out. Many of these can be made without BYB Toppers - BUT they are of course extra yummy if you buy yourself a pack to use… just sayin’
This morning, I treated myself to an epic breakfast using the Apple Crumble Toppers. Super easy and an epic breakfast treat. I hope you enjoy it too!
If you haven't already I'd love you to come hang out with me on Instagram and you make the recipe I would LOVE you to take a pic and tag me! If there is anything I need right now, it is a little more connection - and I reckon the humble oat can do just that! :-)
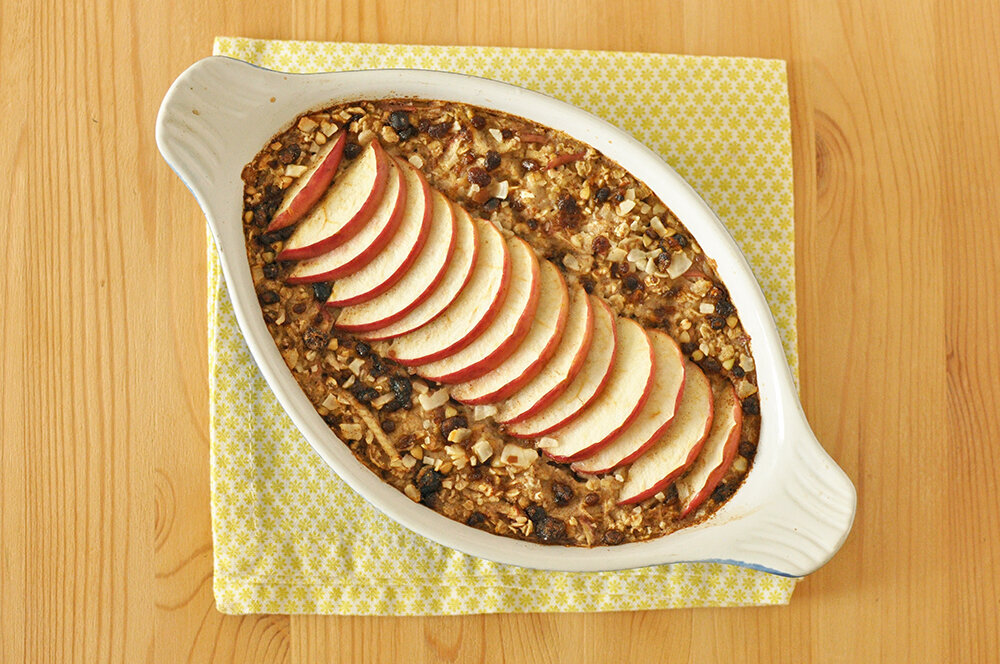
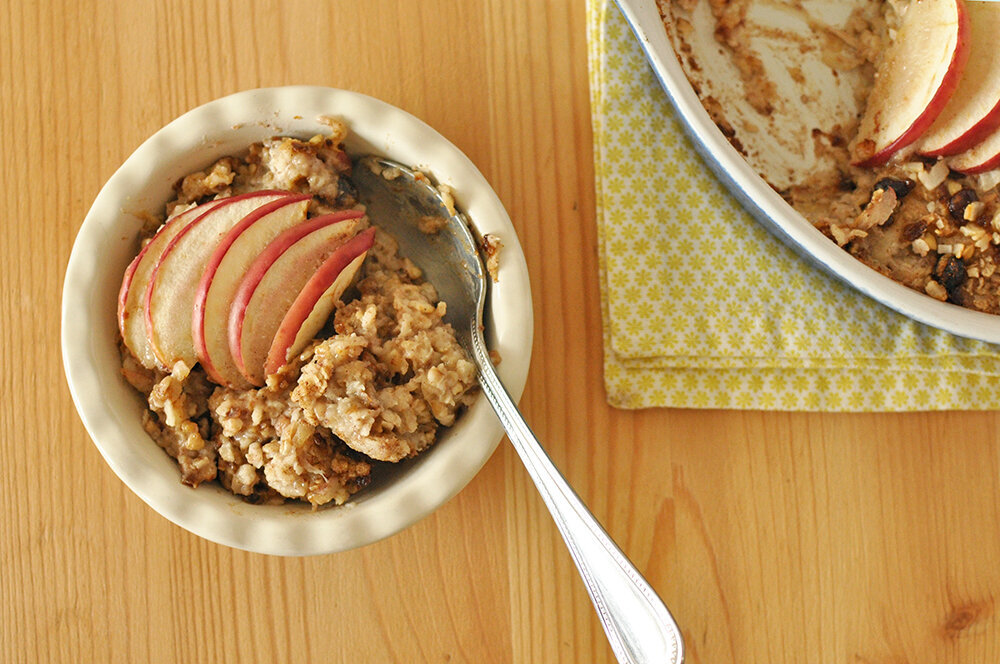
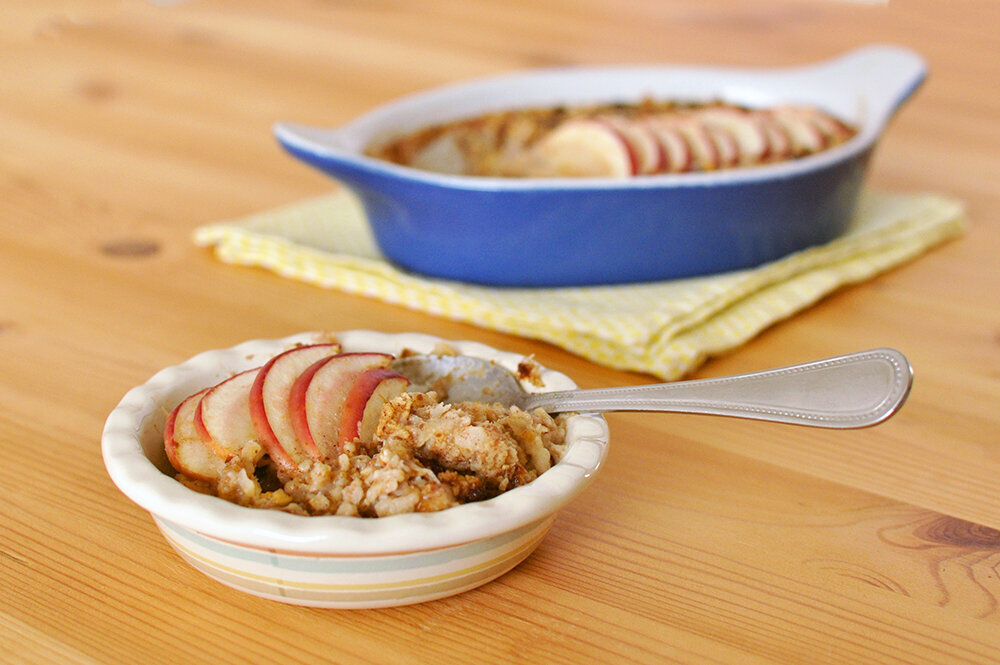
Apple Crumble Baked Oats
Serves two (or one very hungry person) and easy to double/triple
Ingredients:
1 cup porridge oats
1.5 cups milk of choice*
2 tbs flax seed/ground nuts/chia seed (optional)
1 tsp ground ginger or cinnamon (optional)
1 eating apple - halved and cored
2 large handfuls Boost Your Bowl Apple Crumble Toppers or finely chopped dried fruit (dates, cranberry or apricot are all great but any work!)
Method:
Preheat the oven to 180ºC. Mix together everything except the apple in a medium bowl. Grate half the apple and mix in, thinly slice the other half of the apple.
Lightly oil a small oven dish and spoon in the mix. Arrange the apple slices on top. Bake for approx 20 mins until golden. Serve as it is or with a dollop of yoghurt. (*I use non-dairy milk and yoghurt)
This is also great served cold. It will store well in the fridge for a couple of days.
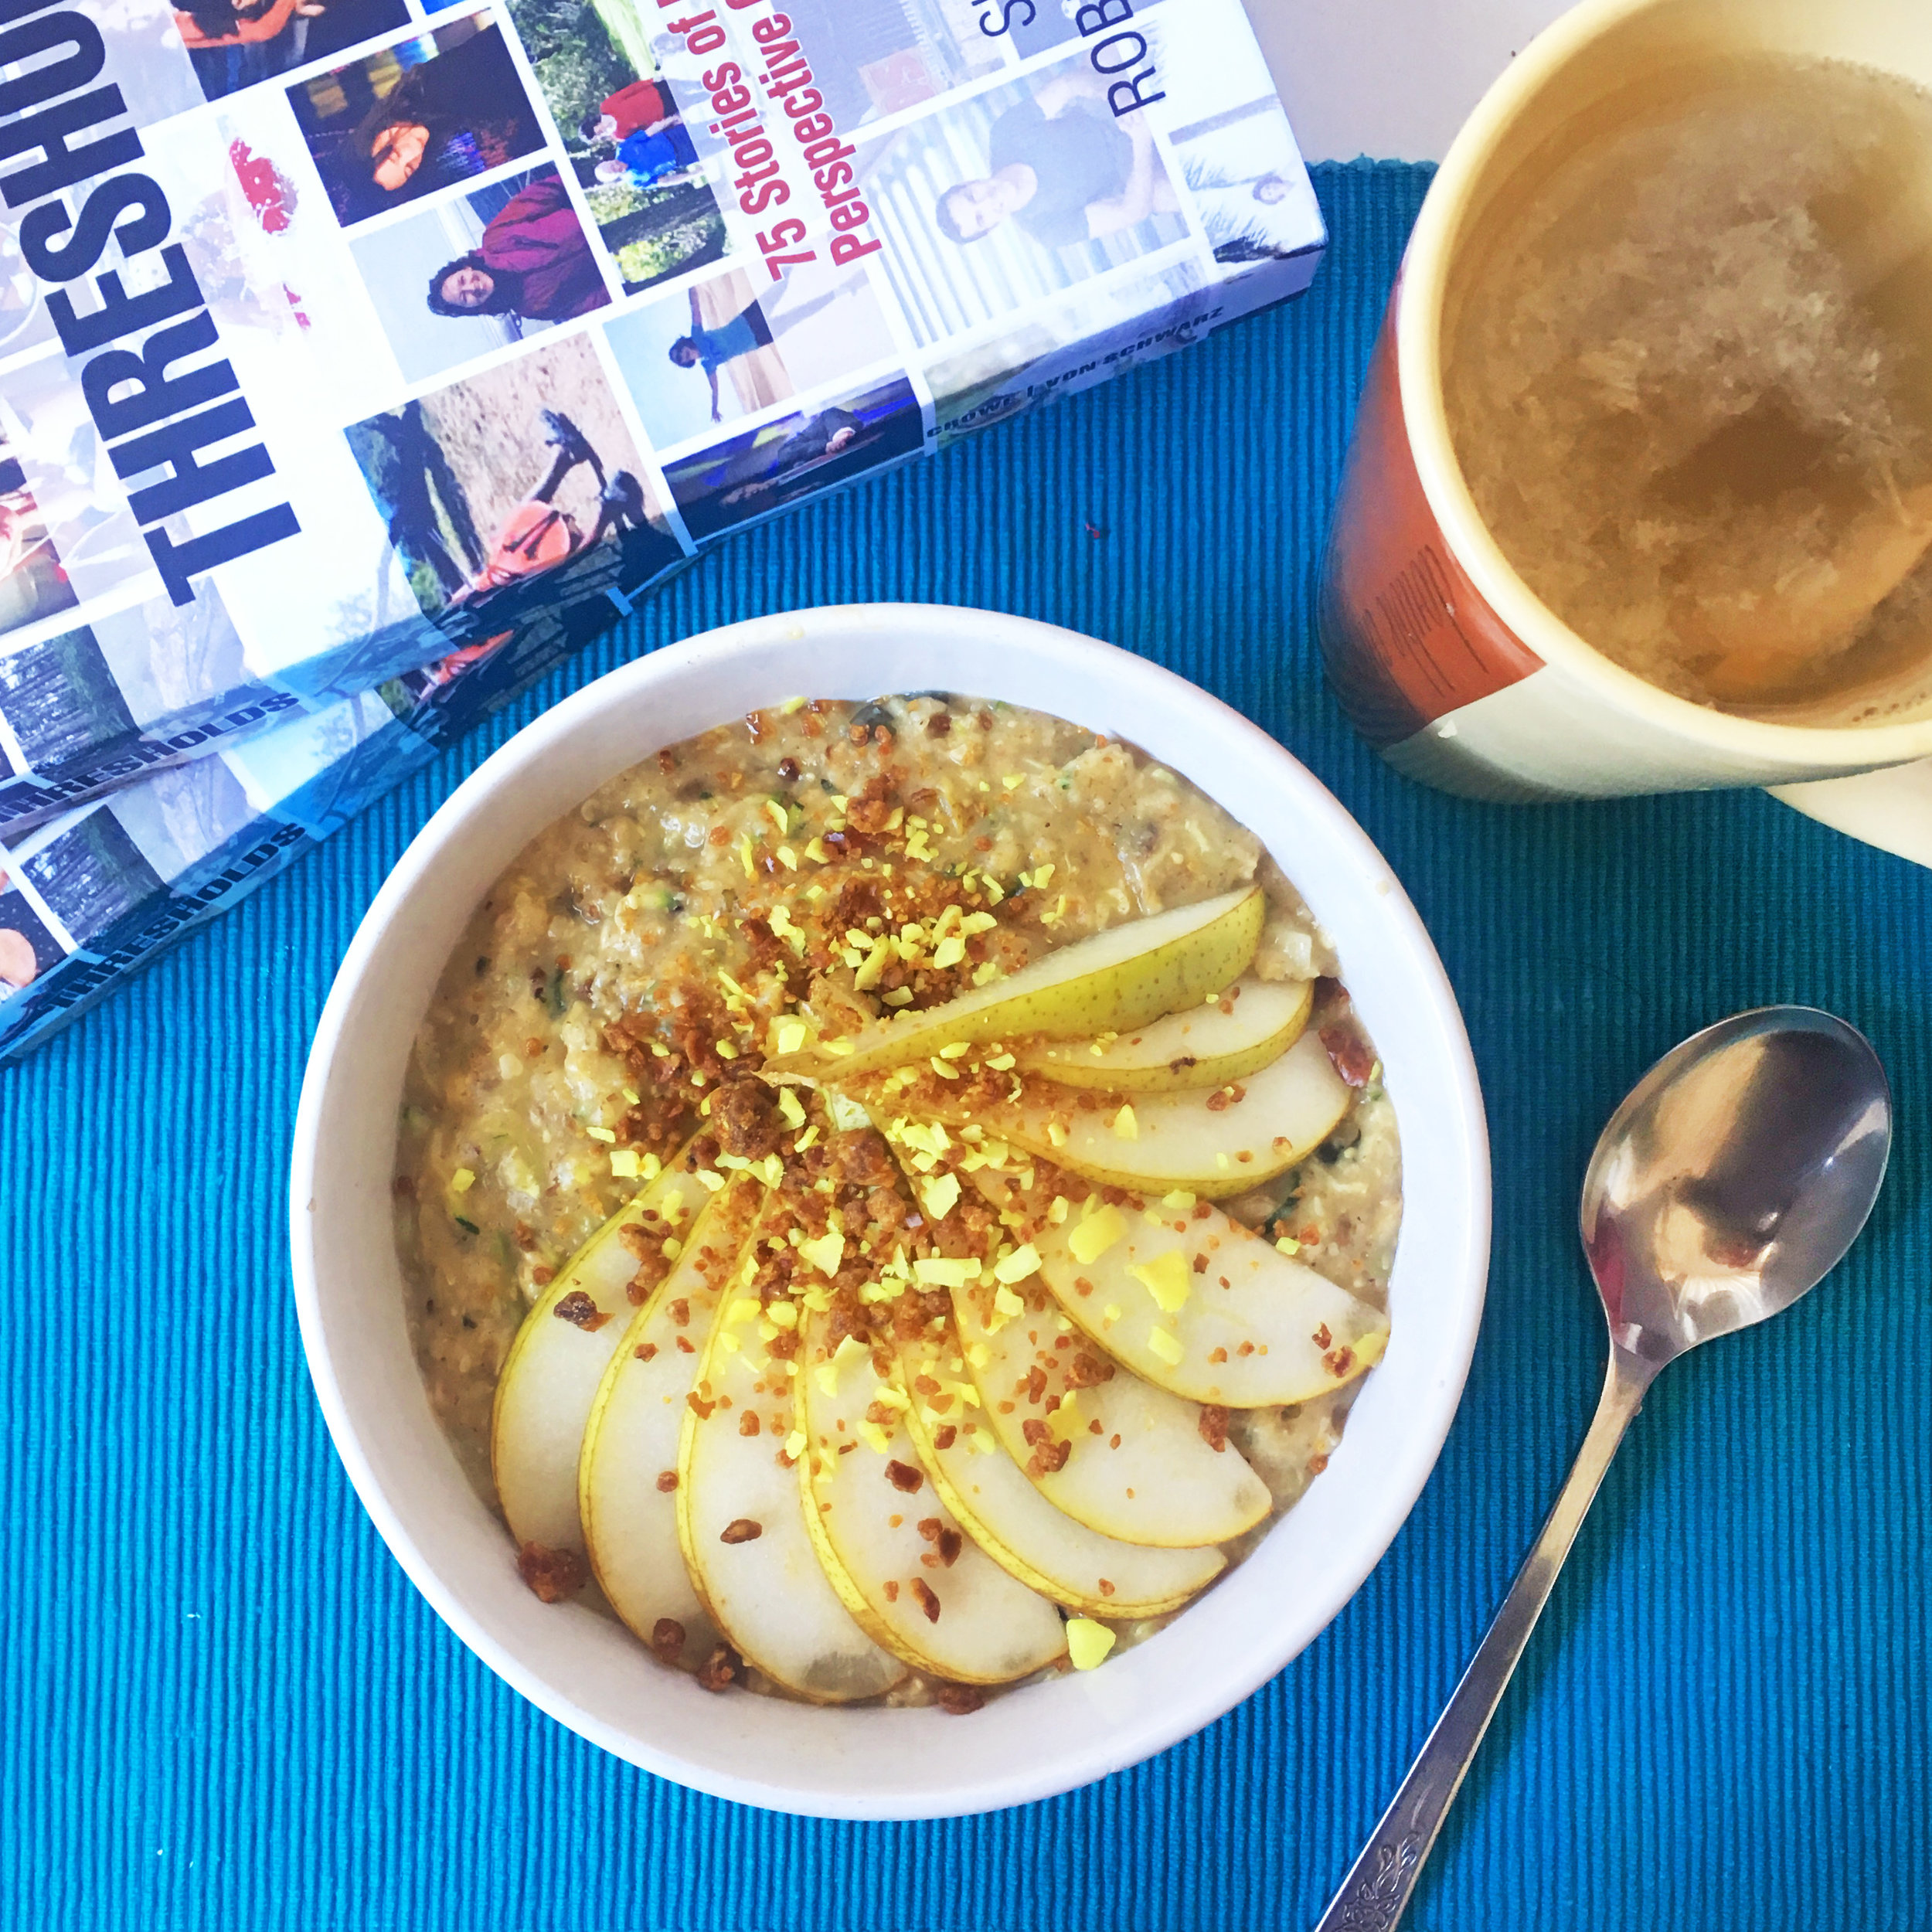
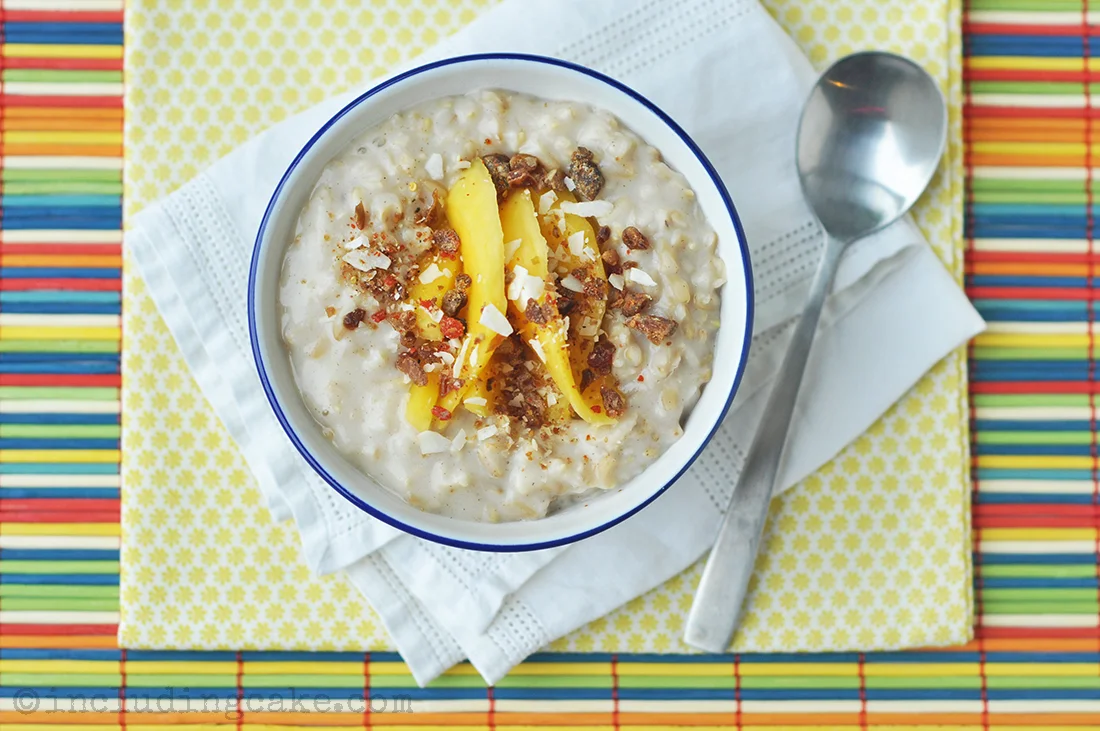
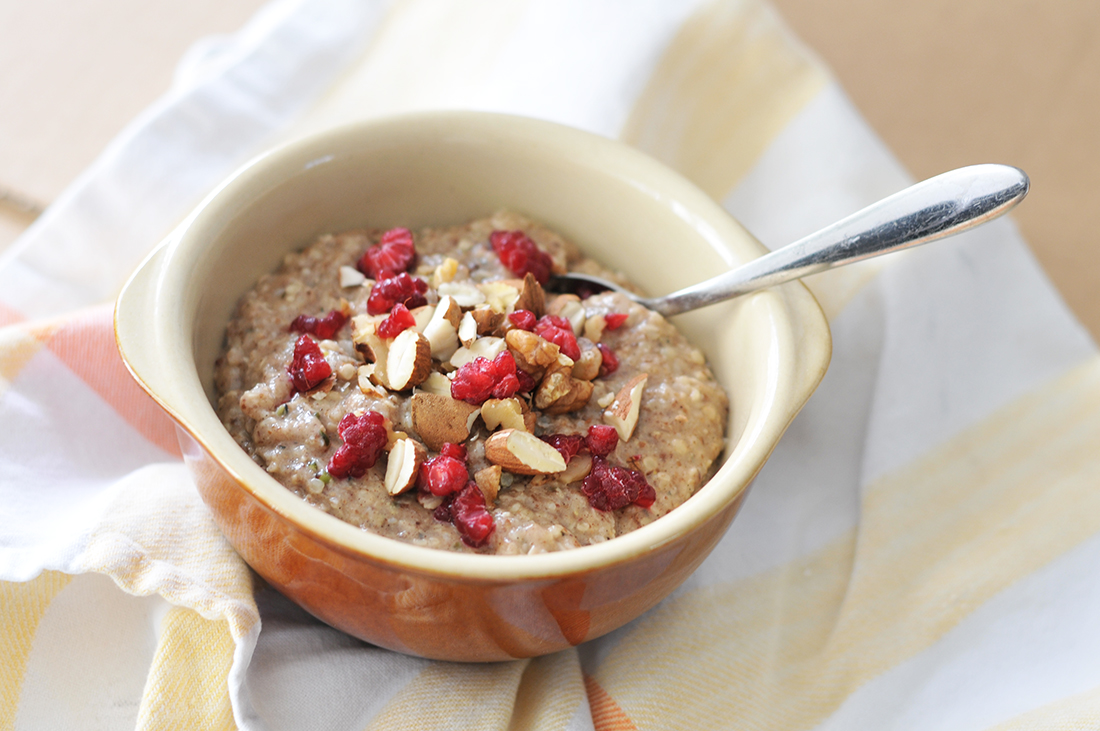
Sweet Potato & Apricot Spiced Porridge
December has arrived.
Festive spirit is in the air.
As is a freezing chill and scraping of car windscreens in the morning ;-)
I’ll be honest, I haven’t really landed in Christmas vibes yet. No sparkly decorations or an advent calendar BUT I do have my Christmas pudding made (still time to make yours!)
One thing I love about chilly days - as well as the sun shining and crispy leaves to kick as I walk through the woods - is porridge!
Big bowls of porridge for brunch!
I do eat porridge all year round both hot as porridge and cold as overnight oats, but there is something even more deliciously cosy about porridge on chilly winter days.
If you’ve been a long-time reader you’ll already know I love to add veg to my porridge, it’s very rare that I make a bowl without. I love the boost of ‘hidden’ nutrition, the overall texture and how it lightens up the oats.
Typically carrot is my favourite or courgette or sometimes beetroot with berries BUT recently I have been absolutely loving sweet potato porridge with a generous dose of mixed spice. Sweet potato has a slight sweetness naturally which reduces the amount of extra sweetness required.
This was a bowl I made this morning, and the addition of dried apricot was amazing both in texture and flavour. I highly recommend giving it a try!
Berries on top are optional- but they look pretty, add extra sweetness and from a nutrition point of view I like to get a portion of berries in each day (I keep bags of frozen berries to hand at all times throughout the winter and use fresh when possible in the summer).
I also added a little sprinkle of Gingerbread Wholeplus Toppers. I am revamping and re-launching my health food business in coming weeks so watch this space… more on that soon. You can follow @wholeplus on Instagram as I will start talking about the journey!
Recipe: Sweet Potato & Apricot Spiced Porridge
Serves 1 (fairly large) bowl
Ingredients:
1/2 cup finely grated sweet potato
2/3-3/4 cup oats
1 tbs chia seeds (or flax)
1/2 heaped tsp mixed spice - more or less to taste
A handful chopped dried apricot
1 tsp coconut sugar or syrup - more or less to taste
approx. 2 cups non-dairy milk - more or less to desired texture.
Method:
Finely grate the sweet potato into a small pan on the stove. Add remaining ingredients and stir through. Bring to the boil, simmer whilst stirring continuously for 3-5 mins. Add more milk as desired.
Serve with berries and non-dairy yoghurt if desired, or just eat as is!


The journey of Wholeplus... (a birthday reflection)
Facebook reminded me of this picture this morning.
This still gives me tingles every time I see it... I can't believe this is five years ago already.
As I reflect this morning I realise how the journey of Wholeplus is such a powerful reflection of my own personal evolution. So I decided to write it down.

It all began as a tiny spark of an idea off the back of a challenge from a trainer at the gym I go to. I was complaining about the junk filled protein bars that so many people eat after a gym work out intended to better their health. It makes me sad. "Oh right, you try and make something better then" he said, ..."Ok, I will", I responded and I remember feeling surprised by the sense of my inner commitment so deep I knew I would follow through.
And just like that Wholeplus was born.
From the naivety of my curious mind, I had absolutely no idea what lay in store.
I began designing everything from scratch. The branding, the website, the promotional materials, the packaging, the social media growth, the recipes developments ... all my own creation and hours of time experimenting, learning and implementing the technicalities.
It has all evolved so much since.
I originally began with four product lines in three flavours each- the first one being a vegan protein-based product and the second product being tiny cubes (bliss ball style). I spent hours and hours pressing mixture into metal trays and cutting up literally thousands of small cubes with a huge double ended knife. (sore hands!)

November 2013

First packaging of the protein product. May 2013

First branding (cringe!!)
Over the following 18 months I refined my processes and whittled it down to two products lines in a wider range of flavours - the Hotpots and the Toppers. The Hotpots (instant porridge sachets) were the last to be let go at the end of 2016 due to practicalities of production. They were popular and I still hope to bring them back one day when the time is right.
I forged ahead with the Toppers. The creative sweet sprinkle topping.
From 2014-16 I had loads of orders coming through. It was the time when the subscription box model was newborn and the more I was featured, the more other companies found me and wanted to feature me too.
Then, I got a big Wholesale white label order which brought in a consistent income every other month. This was followed by my biggest order to date. 3000 tubs of Toppers shipped to Germany on a pallet. I had no idea what I was doing, seriously winging it and saying yes to life. In the lead up to that delivery, the entire house was taken up with boxes of product lining the hallway almost floor to ceiling. I employed my dad to help me.
Life was in flow...
Then in late 2016 things slowed dramatically, the subscription box model changed and they no longer paid brands for their product but instead pitched it as a 'free marketing opportunity'. That was a massive game changer for me as there was no way it was viable anymore and it was no longer an income source.
Until that point I had done no real networking or marketing off my own back- everyone had come and found me and I was just riding that wave and creating, creating, creating... I didn't know how to do it on my own!
I paid hundreds of pounds for consultations with the best in the food industry. Getting advice from as many sources as I could find, trying my best to network even though I hate small talk and 'businessy' environment. I felt increasingly overwhelmed as it was all so far out of my comfort zone and relied heavily on investment. I had already spent most of my own savings paying thousands of pounds in buying the food processing equipment I needed to get up and running.
In early 2017 I took some time out to reflect.
What did I want from the business? How did I want it to grow? What did it mean to me? How did I want to be involved in it over the long term?
I knew I was passionate about health, about personal empowerment, about inspiring creativity in others... but how could I channel this into a food product?
I came up with a subscription box model of my own. A monthly delivery box that would feature recipe cards, motivational quotes and build a sense of community over time. The concept was beautiful and I put hours into designing the product and testing the process with customers.

Subscriprion box concept
But the promotion was hard and laborious. The physical production was now also taking its toll after years all on my own. It drained me and things slowed to a halt before it ever really got started.
For a few months I put it all on the back burner, needing a total break. Then out of the blue an acquaintance asked if I'd be willing to sell the business... my reaction suprised me. 'No, it's my baby, it's my passion, how could I ever sell it!'
That realisation kicked me back into action.
I had no idea how I was going to do it, but somehow I would. But I knew it woudn't be on my own. The Wholeplus philosophy is so much greater than me, it's message needs to be shared with the world, but I cannot do that alone. I needed focus on my skillsets and bring on others to fill in the gaps.
So it re-awakened.
But then there was the packaging dilemma. I was using plastic tubs that I had been unhappy about for a long time. I now had so many boxes of packaging options i'd tried, it was taking over half a room in space. I had been designing and printing all my labels at home on my trusty inkjet to save massive costs and minimum order quantities, but that just wasn't good enough for me any more if I wanted to take this bigger and better...
In January this year I opened up a blank Word document and on it I wrote up a list of 'titles' of people I wanted on board, with me as 'Creative Director'. I kept this in the back of mind in every conversation I had, knowing when the opportunity showed up I would just know.
It happened.
Just yesterday I had a long meeting with the owner of a gym and food business. Someone I have come to know well, someone who complements my skill sets, someone who has the resources for production and investment already set up, and most importantly someone who shares my philosophies.
He proposed moving forward as joint venture, to scale and take things as big as they deserve to be. The idea immediately energised me and I felt a rush of relief, "I'm not alone in this anymore".
We have another meeting to talk details next week.
On the eve of my 35th birthday, the next chapter in the Wholeplus journey is taking shape.
There are so many times I almost quit. There are times when thing slowed to a bare crawl and it would have been easier to have packed it all up and filed it under a 'learning experience' and channeled my energy elsewhere.
But something still tells me to keep going. Something deep down tells me this will be worth it. Something tells me this has been evolving with me in the just the way it needed to, waiting for it's moment, waiting until the world is ready, waiting until I am ready.
Now I am ready.

Rhubarb Crumble Granola (and what is a 'natural flavour'?)
Over the last few month I have been working behind the scenes to develop my Wholeplus flavour range, it is still in the works but I hope to unleash the exciting new products and creative philosophy very soon!
A huge part of my investigation process was in aligning optimal taste and texture with highest quality ingredients. When I launched Wholeplus I initially only had three flavours in the range- chocolate, cinnamon and vanilla as these were the only real food powders I could get and I was resistant to explore 'natural flavours' because I didn't understand them. It was very limiting.
So, what are 'natural flavourings'?
Taken from the web: 'Natural flavourings are flavouring substances or flavouring preparations which are extracted from vegetable or animal materials and are not further chemically modified or changed.'


So basically, natural flavours come from natural sources — the original ingredient is found in nature and then purified and extracted and added back into the food. This is the only way it is truly possible to have foods in certain flavours, and nearly all companies use them including most of the health brands I know.
This has become sensationalised in various articles online with headlines such as 'is beaver butt used to flavour your food?' (Yes indeed the anal secretions of beavers can be used in foodstuffs and is actually pretty wide spread in the perfume industry as a musky smell- who knew!) BUT Don't worry this DOES NOT appear in my products!
My biggest takeaway from this process of investigation is to be fully aware, do you own research and ask questions of the manufacturer if you are unsure how ingredients are derived.
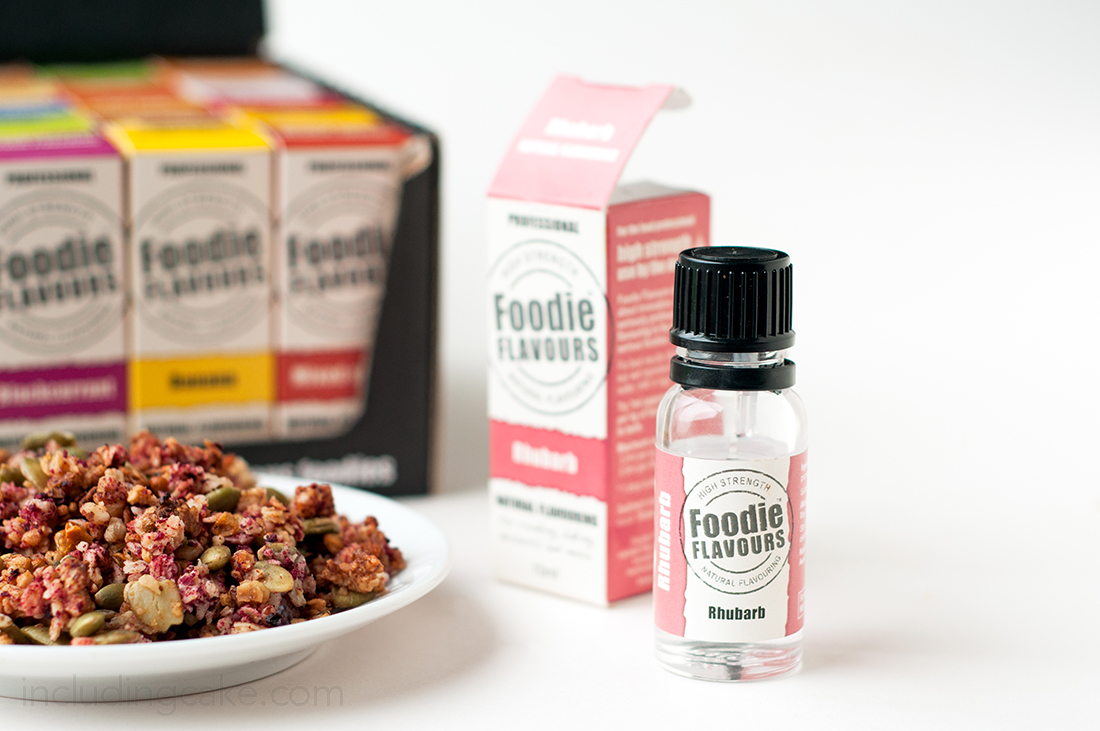
My investigations brought me to Foodie Flavours and after doing some thorough research to understand what natural flavours really are, a face-to-face meeting with the company, and confirmation that all of their products are indeed vegan, gluten free, sugar-free and made in the UK, I was gifted some flavours to take home for my trials.
As well as Wholeplus Toppers recipes, I decided to put the Foodie Flavours to good use and created a granola recipe in a couple of flavours combinations. Both were great, but I have a real thing for the sweet and sour tang of rhubarb which is amazing.
Of course you can use any other 'flavouring' types you like- any extracts of choice or vanilla bean, cinnamon ginger etc.

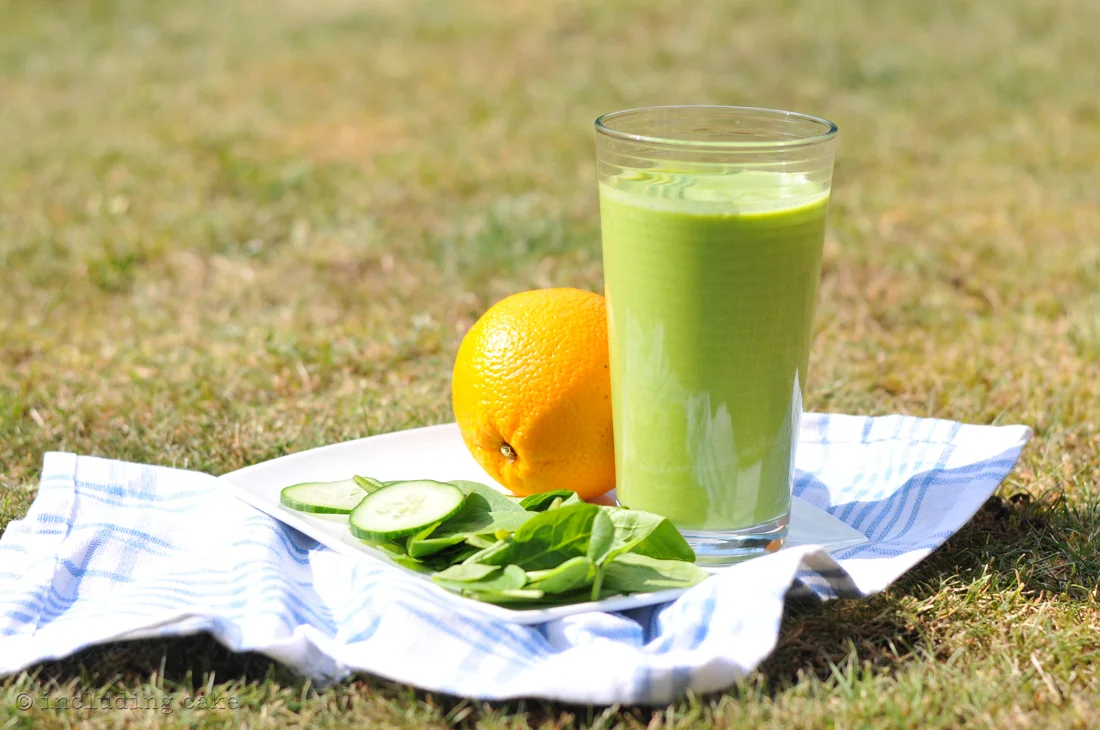
Granola is a perfect snack all on its own, but in a 'smoothie bowl' (top pic) that was almost like custard in its consistency it was a wonderful combo of smooth and crunchy. This was simple to whip up with water, frozen banana and cashews blended up. Yoghurt gives a similar creamy contrast too.
I also love how the freeze dried beetroot gives a great nutritional boost and lovely pink hue to compliment the rhubarb. Beetroot powder would also work well I imagine but I think beet juice would make the resulting granola too wet and soft.
You could add any chopped nuts or seeds you like, I used roughly half pumpkin seeds for some flecks of colour and the rest a combo of mixed chopped nuts.
Other flavours that would make great granolas...
Chocolate orange with cocoa and orange flavour (or zest)
Cinnamon ...because cinnamon with everything works ;-)
Bakewell tart- almond flavour with flakes almonds and some dried cherries (stir those in after!)
Banana Bread- I have tried this mashed with fresh banana and dried bananas chunks and it's great. These was my first granola recipe experiments that used pureed fruit.
Tropical Trip with a tropical flavour and then coconut curls and dried fruit chunks mixed through once cooked.
PB&J granola- this recipe made great chunky clusters!
What are your favourite flavour combos?

Recipe: Rhubarb Crumble Granola
(with Foodie Flavours)
Ingredients:
1 1/2 cup oats
1 cup chopped nuts/seeds
a pinch of sea salt
3 tbs coconut oil- melted
1/4 cup mild syrup of choice (I used coconut syrup)
approx 8 drops Foodie Flavours rhubarb flavour* (they suggest 20 drops per kg of product)
1/4 cup freeze dried beetroot powder* (optional for colour)
*You could omit the beetroot and/or use an alternative flavour type of your choice. I also tried 'dulce du leche' flavour as seen below in the lighter variation.
Method:
Stir together all ingredients in a medium bowl until well coated.
Spoon onto a lined baking tray in a thin even layer and bake for approx 15-20 mins on a medium heat- roughly 160C until lightly golden and toasted. Allow to cool thoroughly before storing in an airtight container. I found the granola lost it crispness after a couple of days, but it still tasted good!
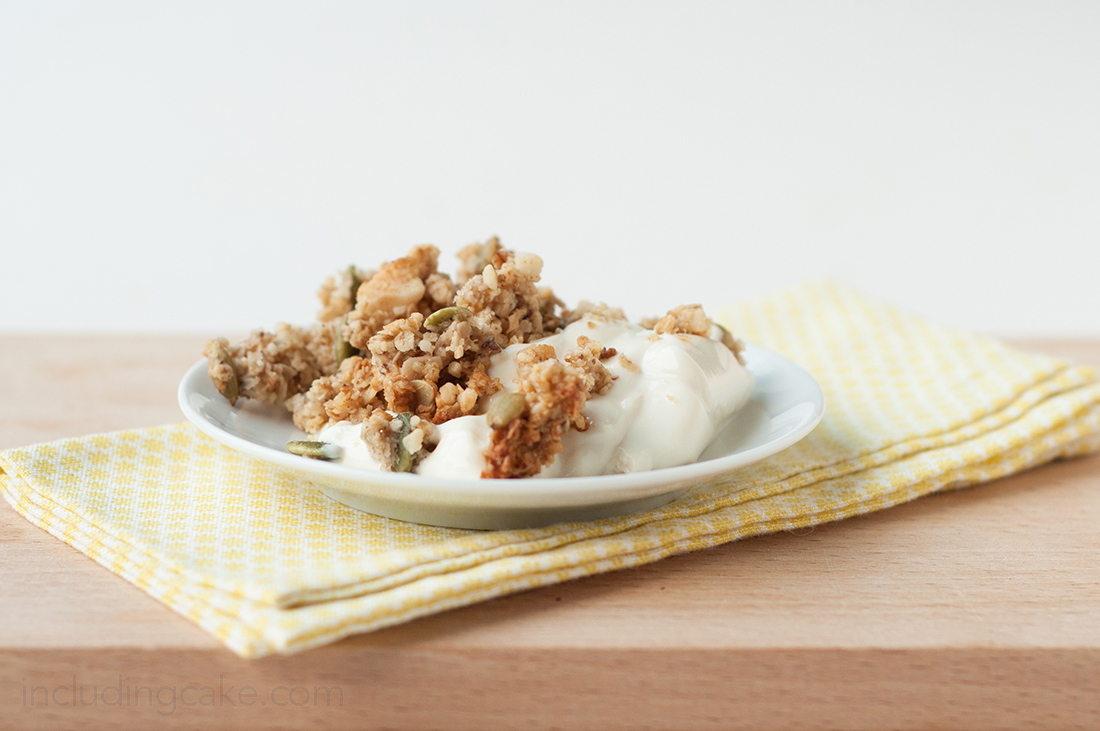
The dulche du leche version. Great with yoghurt too- this is the new Alpro 'Greek style' version I fancied trying out!