
Fruit and nut slice...no bake!
It’s all about the ‘smoosh bars’ at the moment! With all
the recent recipe testing I have an
abundance of dried fruits and nuts.
Also my dad recently went all the way and purchased a Thermomix after seeing how much I use mine for everything from nut flours and butters to soup. Though his is an old style one he bought second hand, I wanted to put it through it’s paces to see how it fared against mine….a little blitzing of some fruit and nuts was the perfect test.
For further guidance on making gluten free choices please see this post.
For tips and info on recipe measurement conversions, ingredients, substitutions and the methods behind how I do things.... check out my 'baking tips' tab at the top of the page.
Also my dad recently went all the way and purchased a Thermomix after seeing how much I use mine for everything from nut flours and butters to soup. Though his is an old style one he bought second hand, I wanted to put it through it’s paces to see how it fared against mine….a little blitzing of some fruit and nuts was the perfect test.
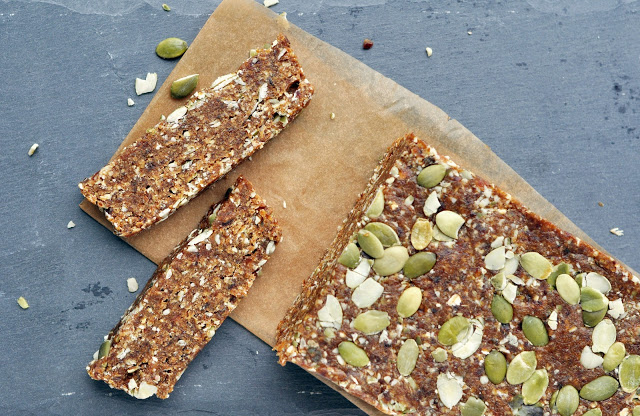
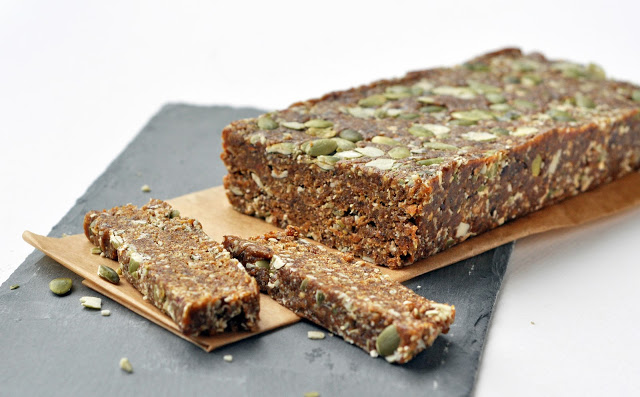
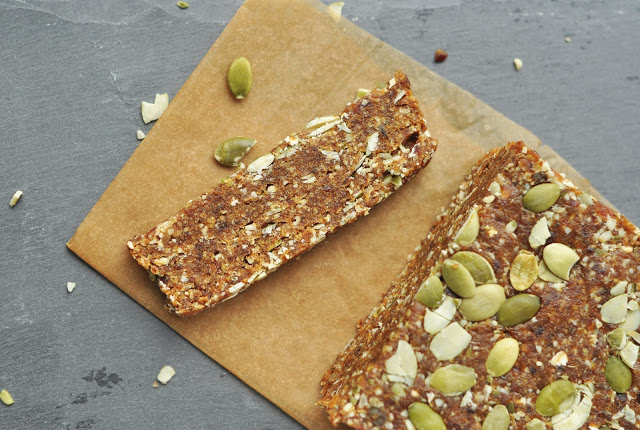
Instead of forming the mix into balls or bars, I figured
I would keep it as a loaf stored in the fridge, so that he could simply slice
off a slither when the desire struck. The flavours and textures work beautifully
and give this loaf a really authentic 'fruit and nut' loaf feel. Keep the seeds and
nuts fairly chunky whilst maintaining a fairly sticky mix, you can also press a few extra into the top. Add a few more oats or dates as
needed to get the right consistency to form a loaf.
Obviously it’s a lot denser than your regular cakey loaf
so a little goes a long way. It’s very moreish so I will warn you now… you may
well find yourself slicing of a little slither and then a little more! If you’d
prefer individual balls or bars then go right ahead, the choice is yours.
Recipe: No-bake fruit
and nut slice
Makes a shallow 20x10cm loaf
Ingredients:
300g dates (or sub some raisins)
70g oats
70g cashews (or other nuts or mixture of choice)
20g flax
70g pumpkin seeds
1 tsp ground mixed spice
1 tsp ground cinnamon
Method:
Process the
cashews, oats , flax seed and spices until just coarse (not to fine). Remove
from processor.
Process the
dates to form a paste, this can
still containas few chunky bits if necessary.
Add all
ingredients and pulse to mix through well whilst keeling a chunky consistency.
The mixture
should be sticky but manageable- add a tsp or so of water if too dry and extra
oatmeal if too sticky.
Spoon the mixture
into a lined loaf pan (or similar sized tin) and press down (I use the back of
a rolling on) until well packed. Chill in the free before slicing to serve.
Check out my other no bake treats here!
For further guidance on making gluten free choices please see this post.
For tips and info on recipe measurement conversions, ingredients, substitutions and the methods behind how I do things.... check out my 'baking tips' tab at the top of the page.